Sunday, March 9, 2014

Headboard finished!

Well the headboard is all done!  (Except about six more coats of oil finish.)

First step was one boatload of ebony plugs.  A few pics of the first corner, which is where the plugs are most dense.


Sanding the splines took forever.  You can see in the picture that the splines are gently rounded over.  It makes them pleasant to touch.  But it took a looonnnng time to sand and polish.

Once the plugs were done, there was a lot of little things to clean up.  There were a couple minor gaps that I filled with a sawdust/glue mixture, and a few dents and dings to sand out.  I'll skip over that stuff because it was boring (although it was about two days of boring).

Today, though we applied the finish.  I'm using a hand-rubbed oil finish with a mixture that I make myself.  I mix equal parts tung oil, mineral spirits, and varnish.  We slather it on, sand it in with fine-grit sandpaper, and then rub it with paper towels until we remove all of the oil except the part that has soaked into the surface.  Applying the finish took the whole family about an hour.  We have to repeat the process six times, waiting a day for it to dry each time.

After only one coat, the finish is still very flat.  And it brought out some imperfections that I'll have to go back and correct.  But even one coat brings out the wonderful color of the mahogany and shows how the whole piece has come together.
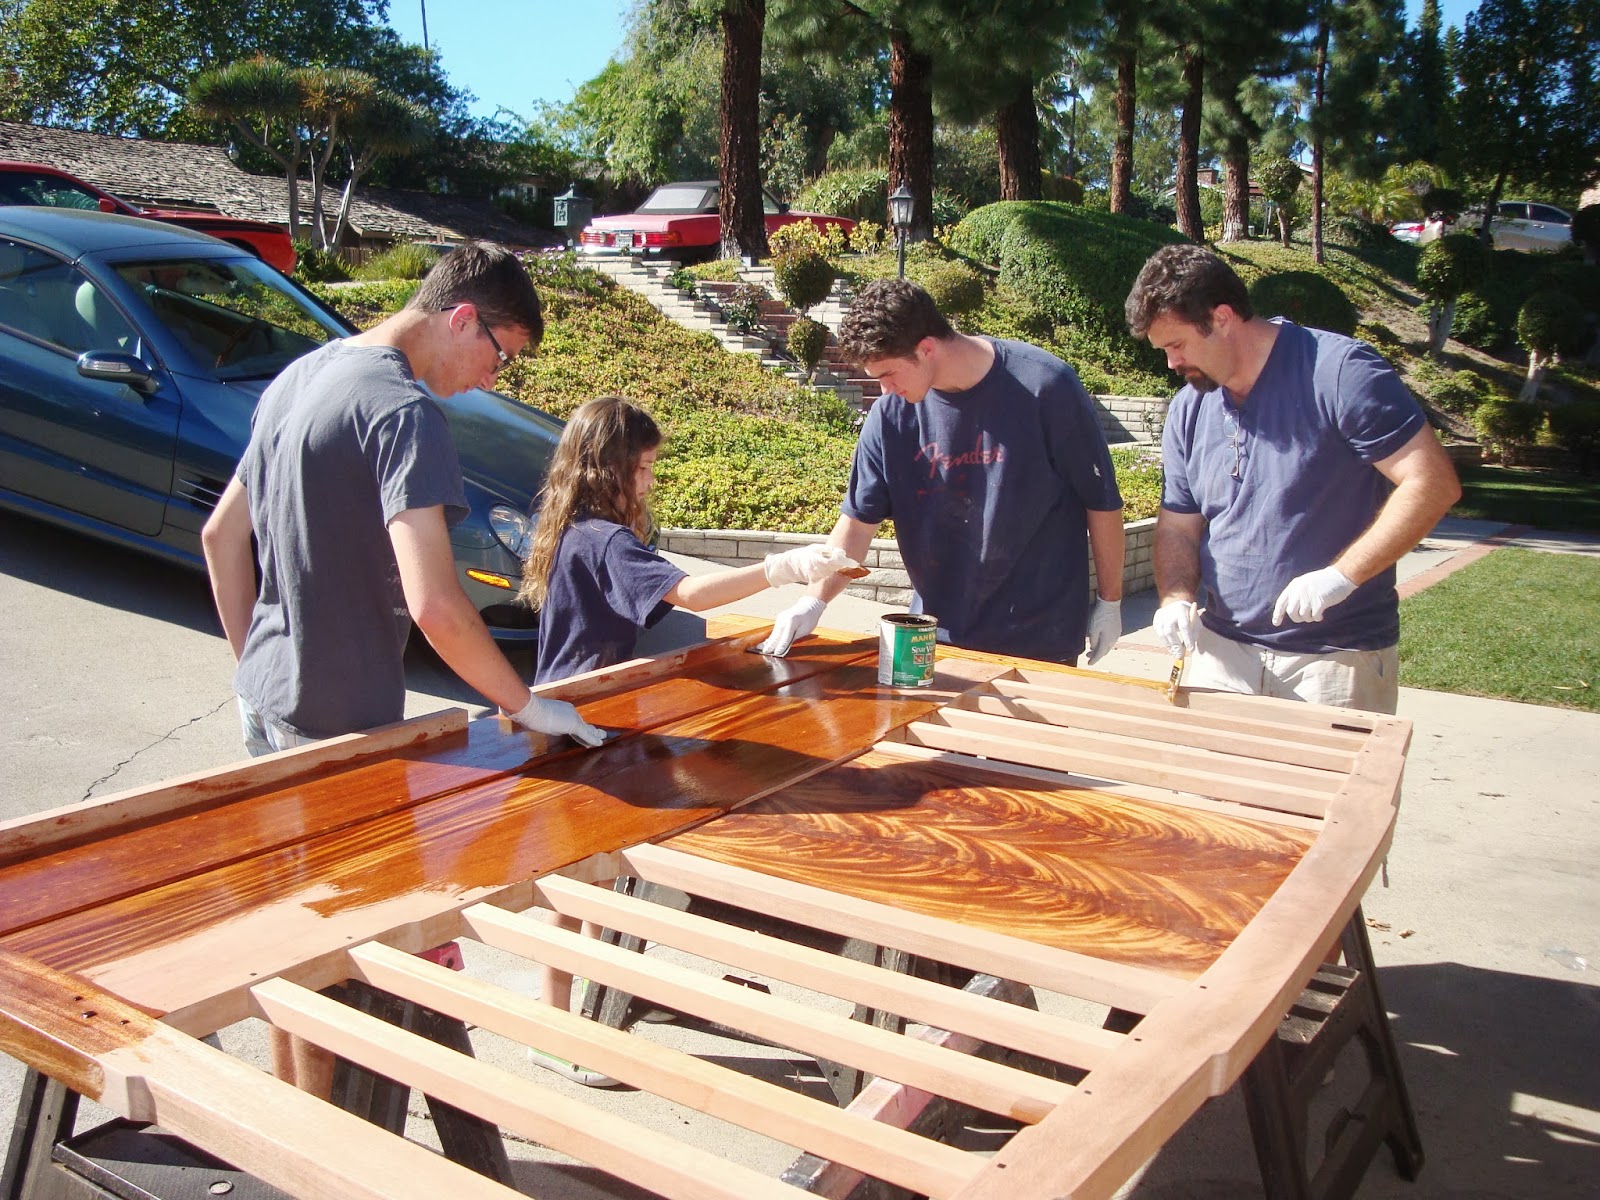


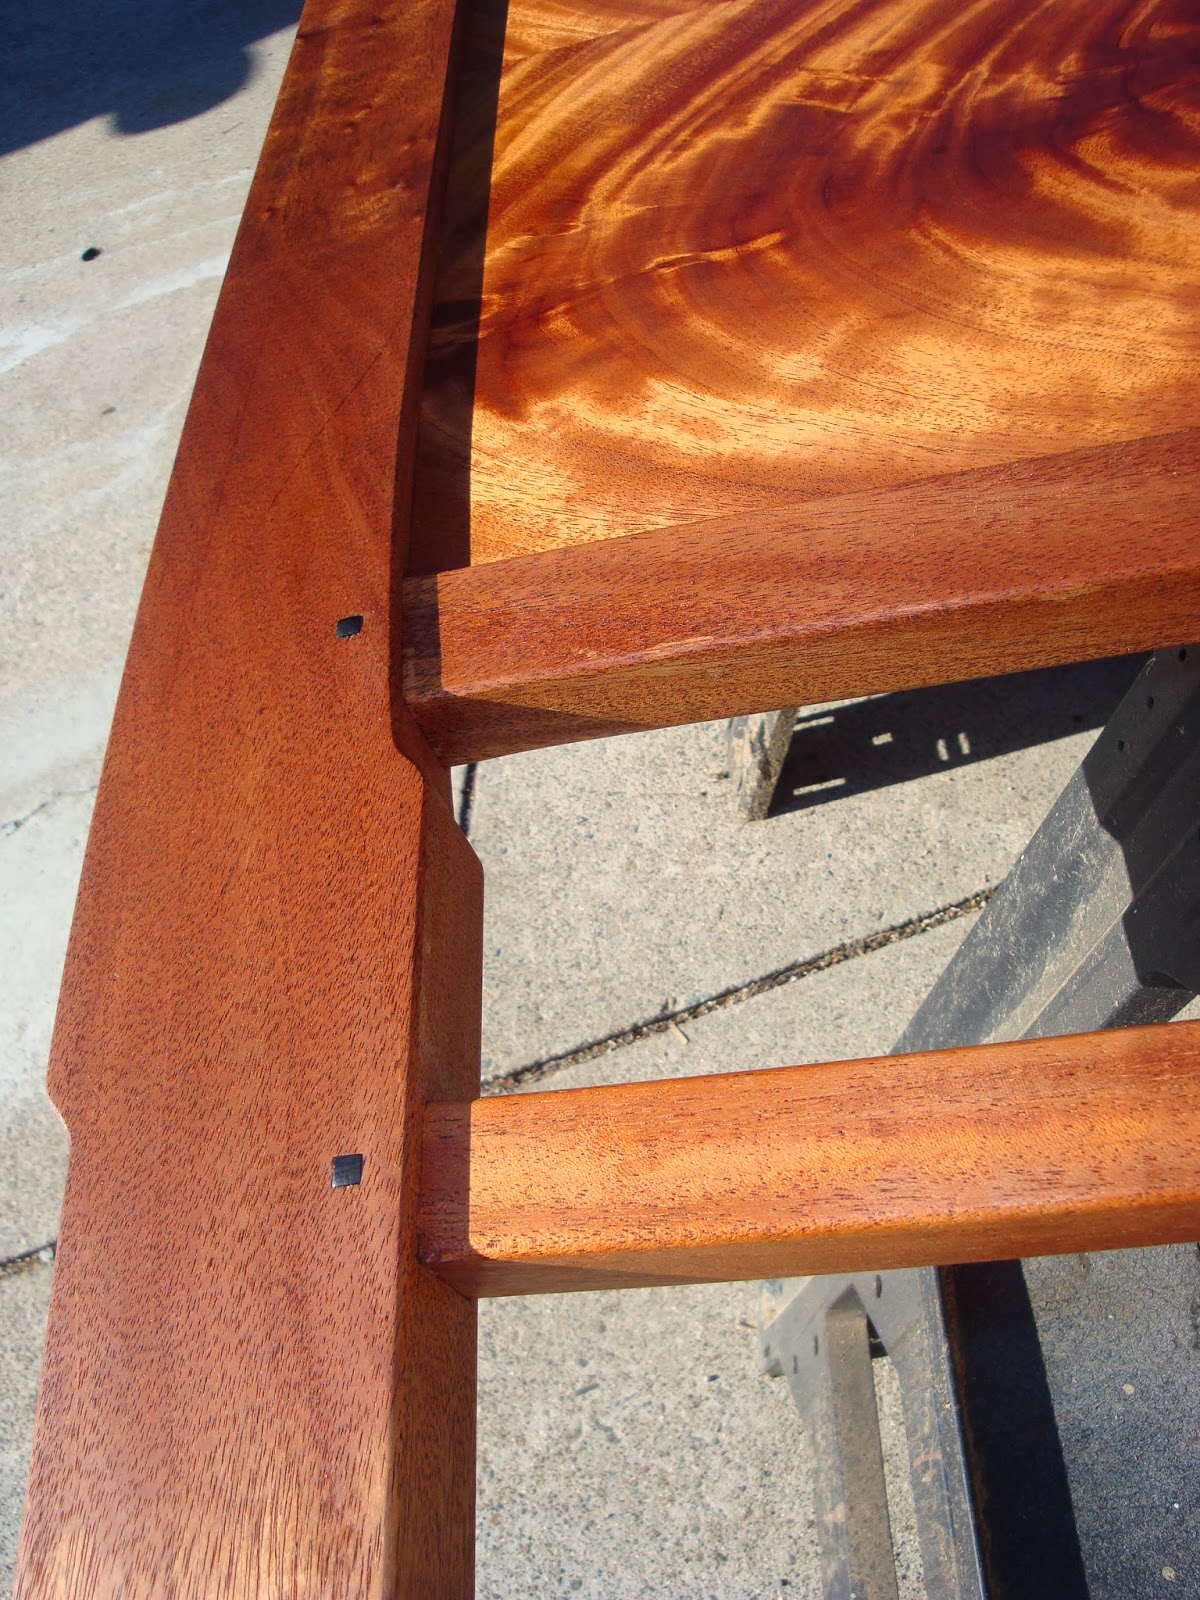


At this point, it looks like a completed headboard.  But we've got six more coats to apply.  And each coat takes five of us working for an hour.  That's as lot of labor!  And at the end of the process, the photos will look very similar to what you see above, although there will be slightly more sheen (kind of a glow).  But in person, those extra coats make a huge different to the richness and depth of the color, and to how it feels.

So, six more coats of finish and on to the footboard!

Sunday, February 23, 2014

Headboard all glued up!

The headboard is finally all glued up!


We had a few challenges along the way.

First, we glued up the three rails on the bottom.  Unfortunately, there were enough humidity changes that the middle board had stretched to the point it was longer than the other two boards, such that the boards were perfectly flush on the right but not on the left.  See the little ledge where the two boards meet?


The result is that there's a little gap when the leg is on.  Can't have that.


I adjust the length of the board with a shoulder plane and a chisel.  The shoulder plane makes the edges perfectly flat, and the chisel gets the excess material that is between the tenons.


Once the mortise and tenon joints were perfected, the next step before the glue-up was to put some shellac on the veneered panel.  The rest of the headboard will get a hand-rubbed oil finish, which can be done after glue-up, but this panel must have a finish that provides better protection against moisture changes, to keep the veneer from splitting.  So it'll be a shellac finish, which must be applied now.  I brushed on a couple coats of shellac first.


I let the shellac dry for a week, and then sand it and apply some more finish using a french polish technique.


Next step was to glue it all up.  Jill and I did that Saturday morning.  Unfortunately, it did not go smoothly.  We ran into some snags, and nearly had a significant disaster.  Fortunately, Jill was pretty even-keeled and we got it squared away without any problems.  I didn't get any pictures of the glue-up itself, but we got a glued-up headboard to show for it.

With the glue-up finished, I pinned the mortise and tenon joints.  These joints are strong enough that pinning is not really necessary, but the pins will guarantee that these joints are still holding strong 100 years from now.  I start by drilling a 1/4" hole in the middle of the mortises for the ebony plugs.  I drill deep enough to go through the tenons but not all the way through the leg.


I then take a piece of 1/4" oak dowel with a little glue and drive it into the hole with a drift pin and a hammer.


Next, it's time to trim those "horns" off the legs and upper rail, and to trim the inner portion of that joint to create a roundover in the inner corner.  We start by placing the template over the corner and tracing the profile.


A jigsaw trims away the waste.

I clamp the template back on and use a router with a flush trim bit to get a perfect edge on both sides.  I use a rasp and file to clean it up, and then sand it clean.


At the ledge/upper rail joint, there will be an ebony spline on the outer and inner edges.  I cut the mortise for the inner spline before the glue up, but now it's time to cut the channel for the outer spline.  I do that with a router using a 5/16" slot-cutting bit.  I trim it up with a chisel and it's ready for the ebony.


I trim some ebony to be exactly the thickness of the channel and glue it in place.


Once I have the ebony glued into the inner and outer edge, I trim it with a special bit that William Ng designed specifically for trimming Greene & Greene style ebony splines.  It has a pair of bearings above and below the cutter, and the bearings are a little wider than the cutter so they leave the ebony proud of the mahobany.


And here's what it looks like after trimming the ebony.


Next time, I'll finish the splines on the left side, then a lot of little details (and boatloads of ebony plugs).

Sunday, February 2, 2014

Joinery, Roundovers and Sanding, Oh My!


We fell a little short of our goal of gluing up the headboard this weekend.  Sanding always takes longer than I expect.  But it's not a race.  Once you finish a project, you never remember how long it took.  But you will always notice and remember the little things that didn't come out right because you rushed.  Plus, this weekend was the Superbowl, so we didn't have as much time in the shop.  (We had a great time at our friends' Superbowl party, but it was more because of the company than the game itself.  Wow, that was a bad game.  And a bad halftime show.  And the weakest lineup of commercials in years.  Thank goodness we had a good time in the shop, or this would have been a disappointing weekend!)

Saturday, I cleaned up the joinery on all those spindles.  They were a little tight before, so assembling all 20 spindle joints during glue-up would have been challenging.  So I trimmed a bit off each wall of each mortise, and now they slide together much easier.

Today, Jill spent a couple hours sanding.  The large surfaces get a workover from my Dynabrade pneumatic orbital sander.  We work through a series of progressively finer grits -- 120, 180, 240, 320, and 400.  Anything over 320 is overkill, but then again, overkill is underrated.  Sanding this lower rail took about 45 minutes.  Jill probably takes a little more time than necessary, but the result comes out great.  Boy, sanding takes a long time!


Next, we sand the edges.  The sanding block and a little elbow grease is more effective on the edges than the pneumatic sander.  The edges take a while because the flush router bit (which we used to shape the profiles with the template) occasionally leaves burn marks and  a little tearout.  It's not too bad, but it takes a long time to sand out those imperfections.


Meanwhile, I rounded over all the edges of these boards and the spindles at the router table.  I also shaped the upper portion of the top rail.  This shaping, the roundovers, and the yet-to-be-inlaid ebony plugs are little details that make the bed much more artful than just a bunch of rectangular boards glued together.


Right now, the roundover on the spindles stops about 1/2" short of the joint.  Once everything is glued up, I'll trim that last bit by hand.  I don't round it over yet because I want to avoid rounding over too far and having a little gap at the corner of the joint.

I also coated the veneered panel in Danish Oil.  Normally, we apply our finish after everything is glued up and sanded once more.  But this panel will get a coat of shellac to provide some additional protection.  Since the rest of the bed will be finished with a hand-rubbed oil, the shellac needs to be applied to the panel now while the panel is still separated from the other parts.  The Danish Oil under the shellac brings out the color of the veneered panels very nicely.  Here are some pics of the upper portion of the headboard, without the legs and without the lower two rails.


We have a lot of sanding to do before we can glue this up.  I underestimated the sanding.  But that's OK.  I'm still hopefull that we can get the headboard glued up next weekend.  We'll see.

Sunday, January 26, 2014

Headboard dry-fit! And a walk-through of making mortises for ebony plugs.

You gotta love a day like today!

At long last, we finished squaring up the mortises for the spindles, carefully planed the spindles to fit, and finished cutting the mortises on the top rail for the ebony plugs.  Finally, we can dry-fit the parts and see how it will look.  ("Dry fitting" means assembling everything without glue, so that you can test everything out.)  Here's how the headboard looks:


And here it is next to Jill, because everything looks better next to Jill:


This is still a long way from a finished product.  We have not yet cut the profile on the top of the upper rail, rounded over any edges, installed any ebony plugs, sanded anything, applied a finish, etc.  But this gives you a rough idea of how it will all fit together.

Speaking of all those details to come, here is my process for cutting the mortises for the ebony plugs.  Keep in mind that there are 126 of these on the bed.  And they each take a bit of time.

First, We have to lay out the mortise. Remember how the top edge of the top rail is still flat?  We can use that flat edge as a reference to ensure the mortises are not crooked.


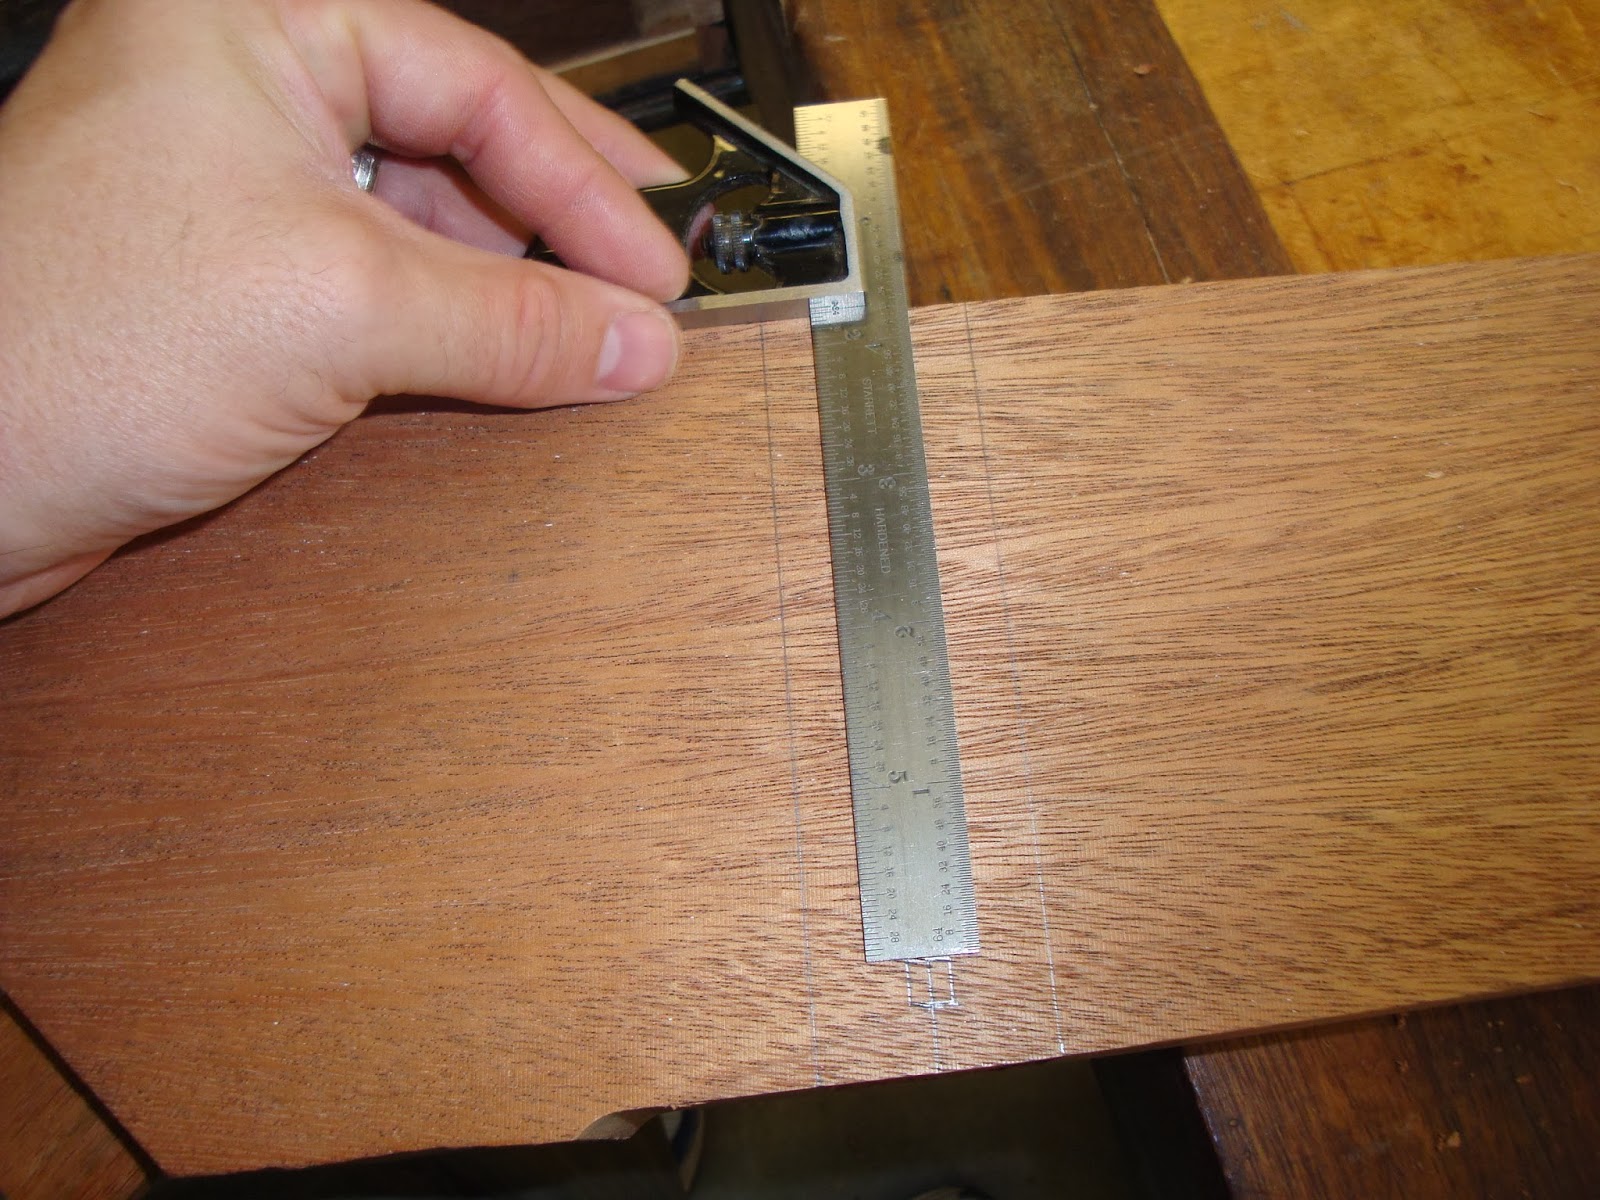
Next, I set a combination square to that flat edge of the rail, and adjust the ruler so that its edge is at the top of the mortise.


I set a mortising chisel flat against the edge of the ruler, right on the square we previously laid out.  I hammer the mortising chisel into the mahogany.


I run a 3/16" drill bit through the chisel and drill a hole in the center of our mortise.


Next, I set a very sharp chisel against each edge of the mortise and tap to sever the wood fibers.


I clean out the waste, and we have a lovely mortise, ready to accept an ebony plug:


One down, 125 to go!